When creating a new Custom Entity and also out of the box core entities, automatically the system in this case CDS will create a series of fields that are used internally and for auditing, and others for user and application use, in this blog I want to give more details on how the Status and Status Reason are used in CDS, and how is been in Dynamics 365 CE for many years earlier.
The Status and Status Reason fields are used to make the records Active or Inactive, giving you the option to mention why the record is active (New, Active, In-progress, draft) or inactive (Cancel, Completed, Sent, …), when the record is inactive in Dynamics 365 CE, you can NOT make more changes to the record and you will need to reactivate the record, process that was part of the Command bar items. At this time we have a much easier way to update those values, not only on the Dynamics side but also in the Common Data Services.
Let’s get to the details on how is used, the following link is the Documentation for Dynamics 365 CE previous version on the Status options, the common settings for the status and status reason where the State is the

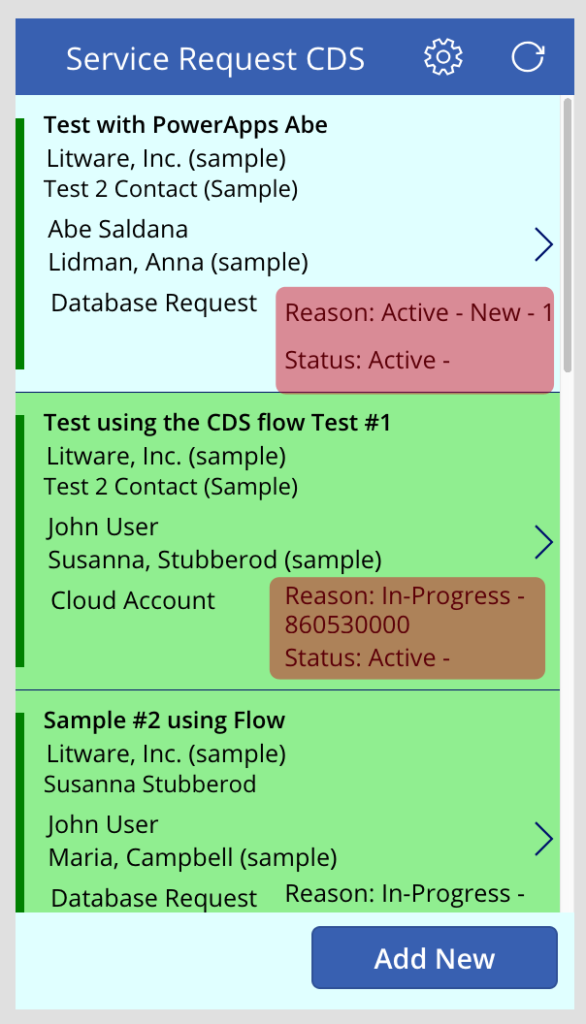
My Service Request PowerApps Application I added the State and Status Fields in the browse gallery and also create a custom screen that will display the status and how to change to other options.
When creating new Status Reasons the out of the box values are single digits, like Active-1, inactive-2, and so on, but when adding custom status reasons, like In-Progress the system will add a long number like the Optionsets, in my case the number starts at 860530000.
These are the values I have for my custom entity:
| State (statecode) | Status Reason (statuscode) |
| Active (0) | Active – New (1) |
| Active (0) | In-Progress (860530000) |
| Inactive (1) | Inactive (2) |
| Inactive (1) | Cancel (860530001) |
| Inactive (1) | Completed (860530002) |
I have a screenshot on the application main screen and you can see the values on the records. I added 2 labels with the values of the State and Status.
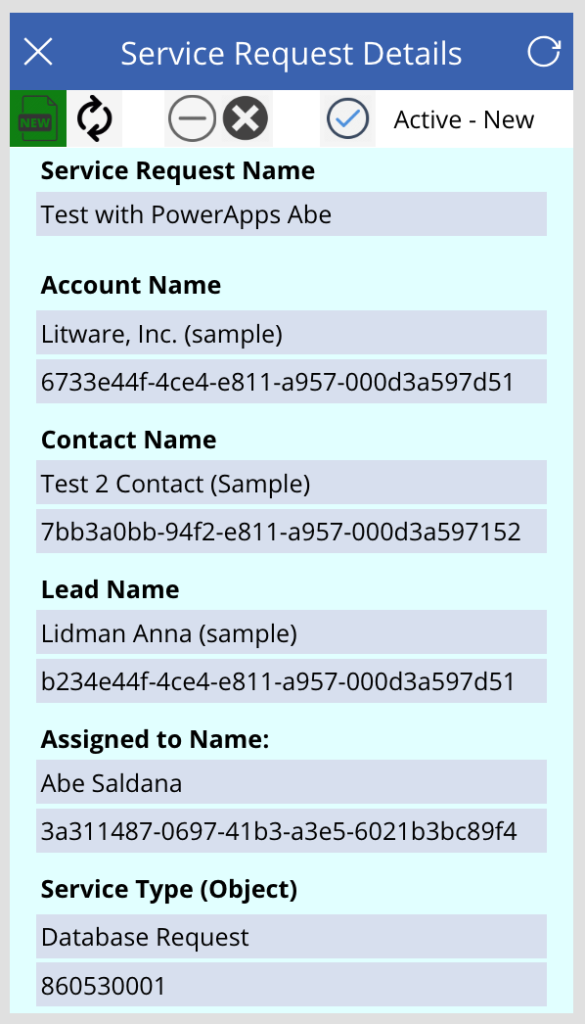
The application have another screen where all the records details are display and we have a better view on the Status for the record, also I emulated the Command Bar that is common in the Dynamics 365 CE forms, and included the Status for the record and the status we have available to change or update for the record.
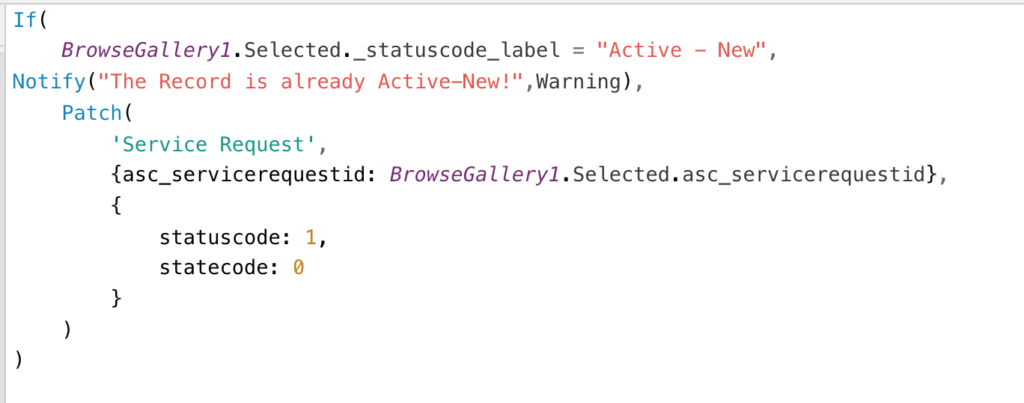
In the video I explain more in details all the options and how to change, but in this blog I want to include the screenshots for the code and how to update from Active to Inactive and vice versa, let begin with the Active – Active-New code.
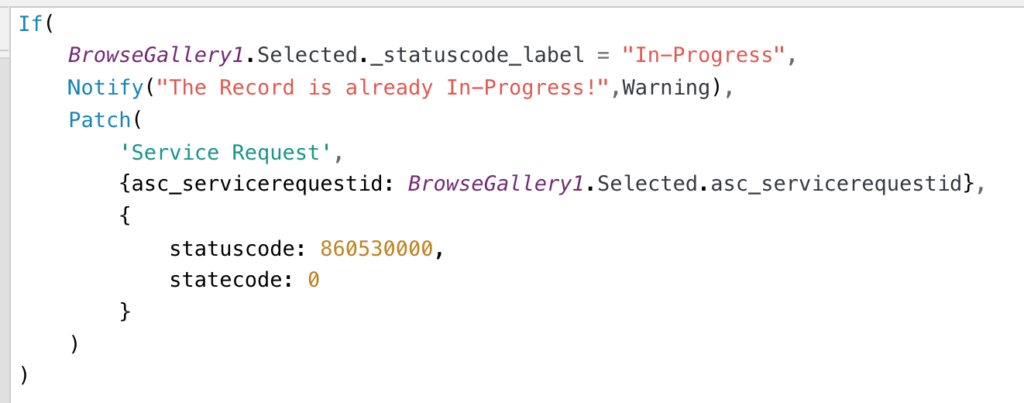
Next lets check the In-Progress code.
Let’s go now from Active to Inactive, and review the code.
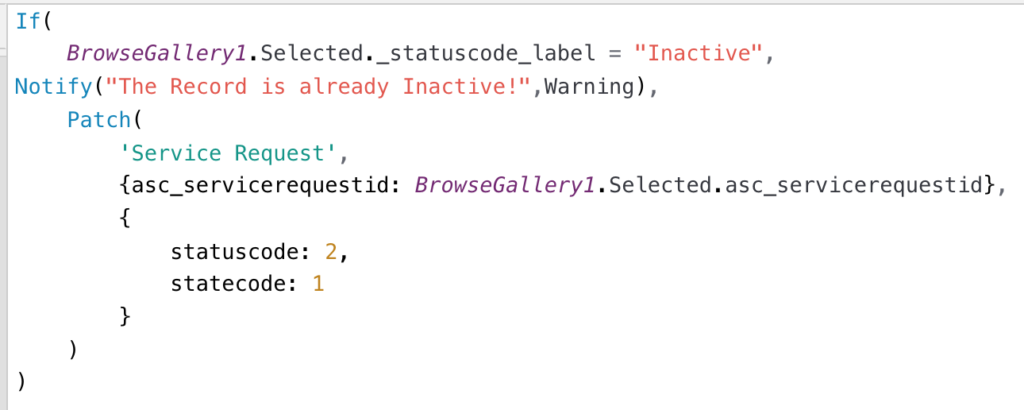
Almost done and now let’s see the Inactive and Cancel code.
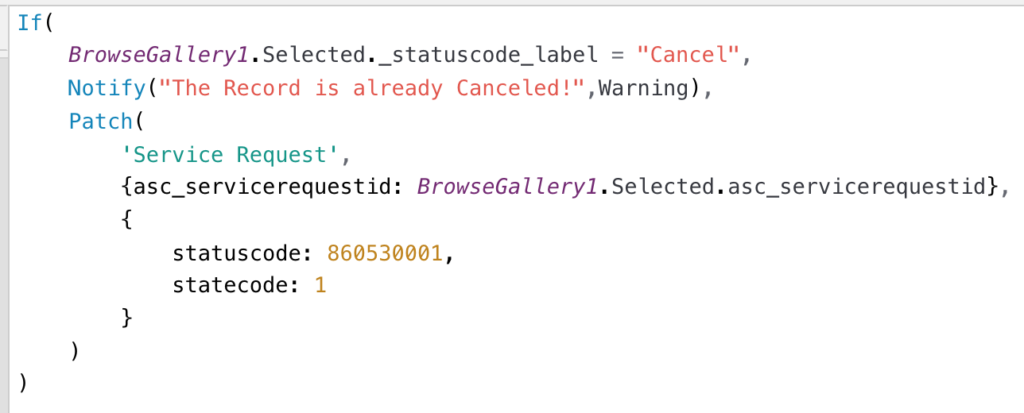
Finally we will review the Completed code.
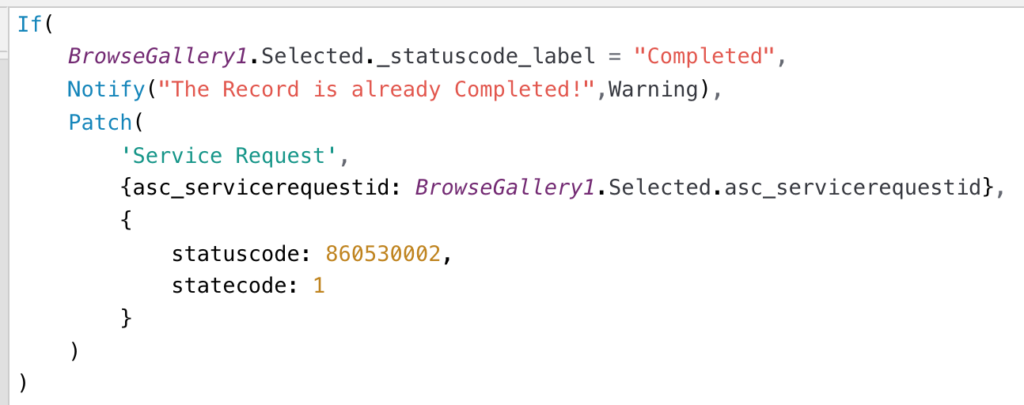
THIS BLOG POST HAVE A VIDEO!
To see step by step how to use the State and Status Fields with CDS and Dynamics 365 connectors
Stay tuned for more blog post and videos.
★ Join my FREE EMAIL to get more information and videos on Power Platform and Dynamics 365 CE!
★ Have a blogging or video request? Let me know! (social media links below 😉
* Amazon referral Link:
* Gear list: https://kit.com/AbeSaldana/video-and-podcast-gear
== Follow Us! ==
- Website ▶︎ http://AbeSaldana.com
- Subscribe ▶︎ http://AbeSaldana.com/EmailList
- Blog ▶︎ http://AbeSaldana.com/blog
- LinkedIn ▶︎ https://abesaldana.com/linkedin
- Facebook ▶︎ https://abesaldana.com/facebook
- Twitter ▶︎ https://abesaldana.com/twitter
*Some of the links in this description may be affiliate links, which means I may receive a small commission at NO ADDITIONAL cost to you if you decide to purchase something. But I don’t recommend anything I don’t love so no worries about that! 😉